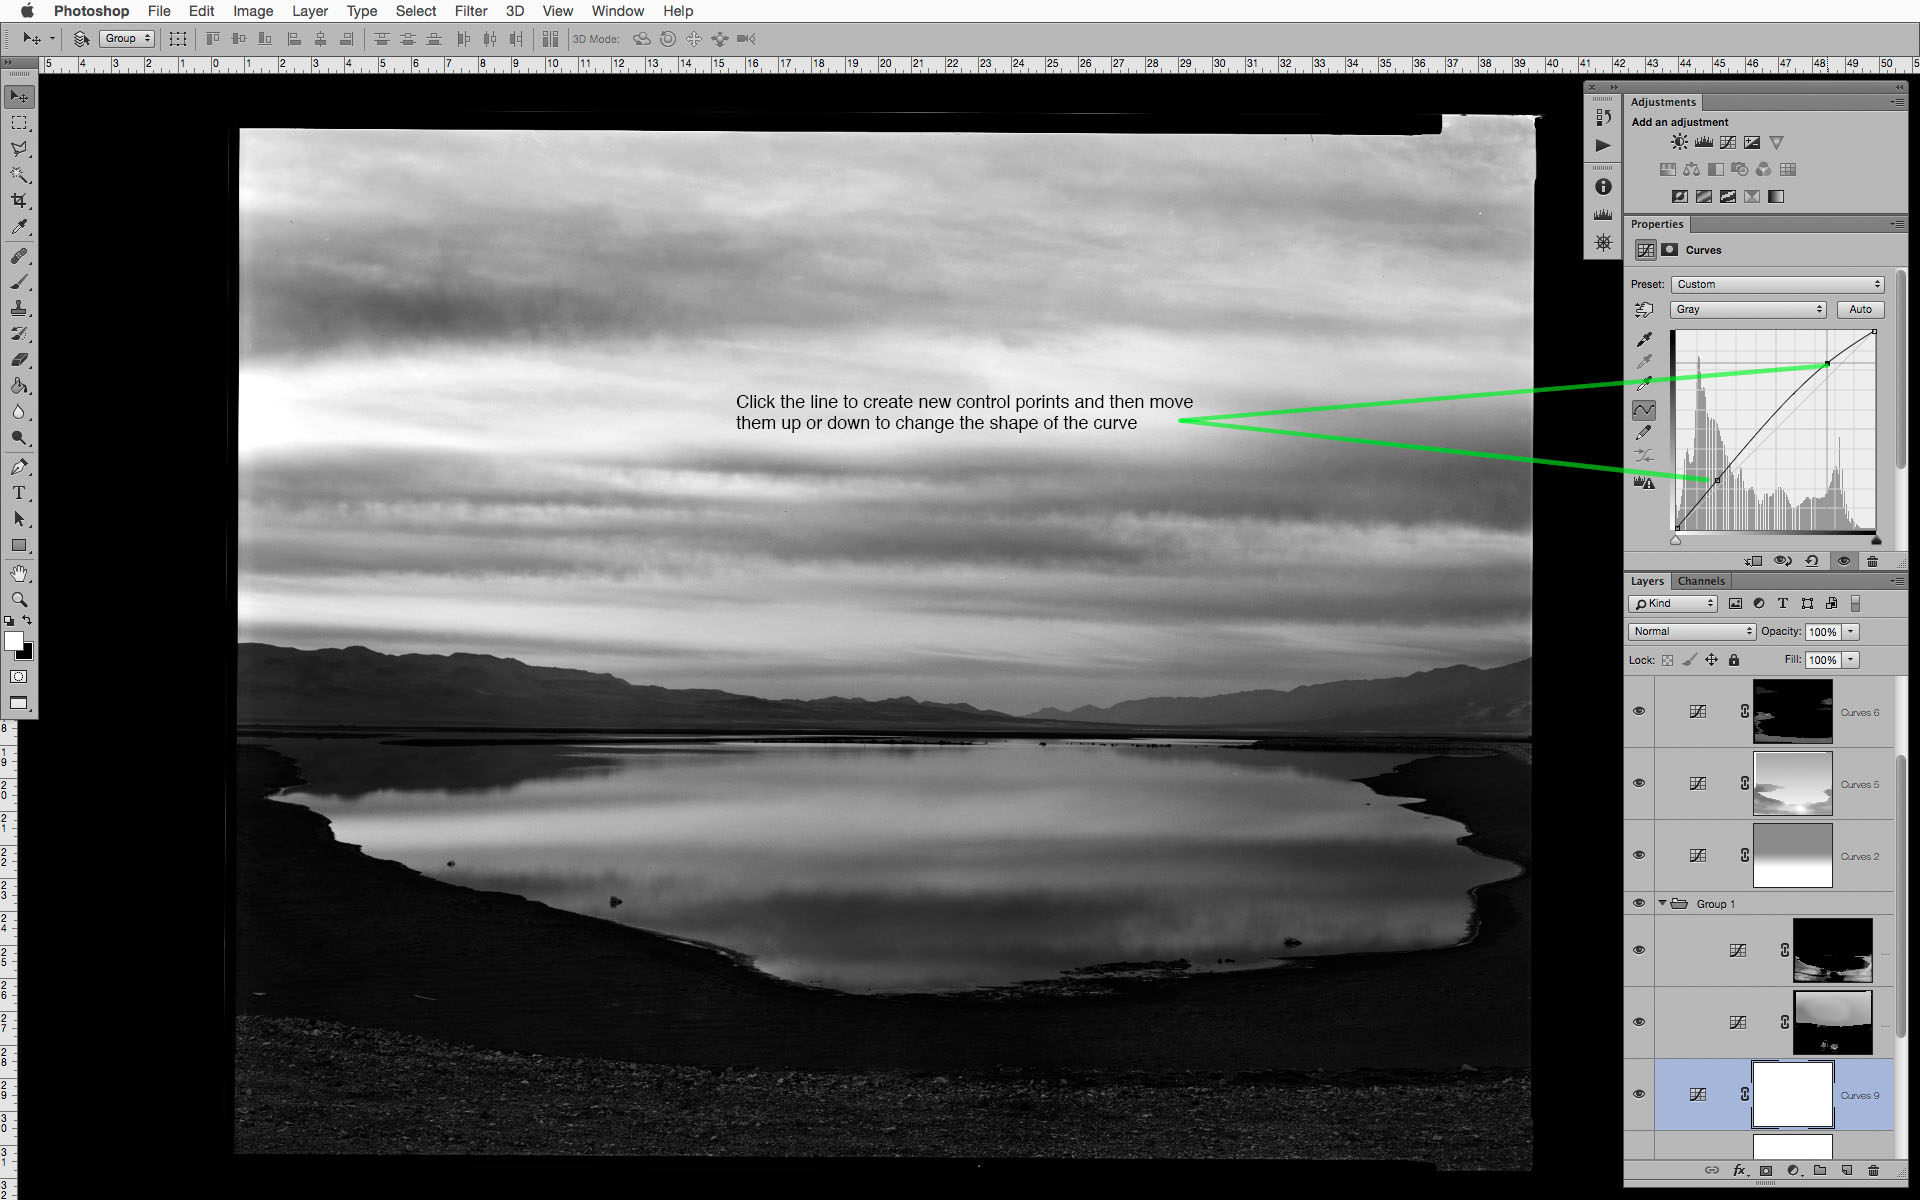
This is a continuation of the introduction to what I have come to call my Intuitive Localized Contrast Control Method, which is essentially dodging and burning by working directly with the tones in the image rather than with the Burn and Dodge tools in the Photoshop toolbar. This post focuses on one of the most important editing tools in Photoshop—the Curves Adjustment Layer and its Layer Mask.
The curves adjustment layer is going to be the primary tool for creating your initial tonal adjustments, overall lightness/darkness, global contrast enhancements, dramatic burning and dodging effects, local subtle tonal changes, and final printing adjustments. The curves adjustment layer is the workhorse tool, and can do just about anything when it comes to tonal edits in your black and white images. There are other adjustment layers that can be use for altering brightness and contrast and input and output points, but nothing is as controllable as a curve adjustment.
CURVES BASICS
It its most simple form, the curves adjustment layer allows you to define a point on the tonal scale and move it to any other point (within limits—there needs to be a minimum separation from one defined point to another). Photoshop then interpolates the tonal values of all the other points along the scale relative to the adjustment that was made. You can click on the line in the curves property panel to define a control point, or click the Scrubby Slider icon to select the tone to edit by simply clicking on it within your image and dragging that value up or down to make it lighter or darker. It is possible to have as many as 21 different control points per curves layer, but you will find that you rarely need more than 2-3 control points to create a wide range of edits.. One of the most common beginner mistakes is creating too many points with one adjustment layer, which can lead to harsh tonal transitions, reversals, posterization, or other editing artifacts.
So why not just use the image>adjustment>curves (cmnd[ctrl]+m) rather than a curves adjustment layer?
The standard curves adjustment will permanently alter the image pixels of the image layer it is applied to. If that is done on the background layer, it will have been what is known as a destructive edit—an edit that cannot be modified separately from the image it is applied to. With an adjustment layer, the pixel values in the underlying image layers do not change, but are only affected by the adjustment layers above them. You can return to those adjustment layers at any point and they can be altered again and again until the layers are merged or until they are all flattened down to a single background layer.
So what is the best way to work with the curves adjustment layer?
Well, that depends on the situation... If you are making large global edits that affect the general lightness and darkness or overall contrast, create a new curves adjustment layer, choose a point on the section of the curve where you want to have the majority of your effect take place, and move the point of the curve up or down depending on the adjustment you want to make. Alternatively, and to work more intuitively, you can select the scrubby slider icon and then click (and hold) on the tone in the image that you want to affect and simply drag up to lighten or down to darken. If that isn't the tone you wanted to edit, you can undo or drag the control point off the curve and select an other tone. If you create two or more points that are too close together you will see that it can introduce some dramatic and unwanted effects, so I recommend 1-3 widely spaced control points for global contrast or lightness and darkness edits.
In the next post I will go into detail about how this workflow differs from how people are usually taught to use adjustment layers and masks, and how you can work directly with the tones in the image without worrying about your image taking on an overly affected and unbelievable quality.
About This Photograph
From now on I will begin giving more details, technical and otherwise, about the photographs used in creating the example screenshots. In many cases they will have not been previously seen or published elsewhere here or on my personal website. In some cases, like this one, the it is still in the editing stage, and is meant to show how I use these techniques on a day to day basis.
This particular photograph is part of my Lower Owens River Project in a part of Owens (dry) Lake where water is pumped in as part of the Dust Mitigation Project that I recently drum scanned to make a series of larger exhibition prints. The original 8x10 negative was made in 2009, and I there were some developing defects that prevented me from making a final gelatin-silver contact print.
The ability to control all the delicate midtones and highlights in the sky and reflection in the water while at the same time increasing the the dark shadow detail and midtone separation is something that could not have been done as easily in the darkroom. When combined with a smooth rag paper and the Peizography Carbon inks the richness of those tonal values are where images like this can really sing.


